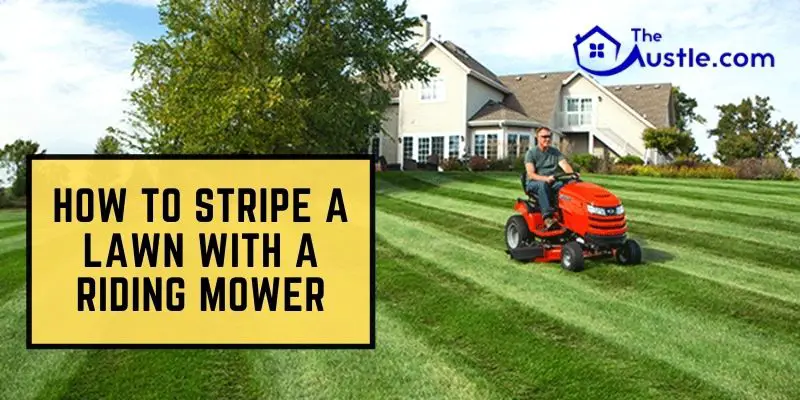
It is the fascinating matter of numerous lawn lovers to get their ground of green grass looking like the carpet; to assist your work we will show how to stripe a lawn with a riding mower. It can look like this only by the proper striping and workout with several colors.
If the stripes and deviation of color stand out impressively it will get the look of your desired one; in our writing how to stripe a lawn with a riding mower the lawn-lovers will have easy and accepting idea and direction to accomplish this in their lawn garden.
It is not the work of curator or gardeners. Those who are passionate about making all these with their own they will like the article.
How to Stripe a Lawn with a Riding Mower with Some Flexible Steps
We can make the prime change in your as usual shearing direction by switching the regular way you sort out every time.
Let’s get the enlightenment of a few simple tasks of how to stripe a lawn with a riding mower.
Step 1: Starting with the mild technique
We will start with a mild technique. First, we will have to identify the starting point. Examine the whole boundary of your yard.
First, decide Up to where you want to cut your grass. Then we need to set the border around the yard for a mow.
Step 2: Maintaining the line carefully
Choose your selected side. Start cutting your grass from one direction. Do not go zigzag or scattered way. Otherwise, the final look of the lawn will not be good. And it will ruin all your effort.
So this step is significant, please take note. The line should be perfectly right away, and we also need to keep the line parallel to the edge of the lawn.
Step 3: Rotation of riding the mower everywhere
Raise the deck of the mower and rotate the riding mower from place to place. Go to the opposite way.
In the next step, while we will be using the first row, we must be ensured on that to put away an overlap of a few inches above the earlier mowed area.
Cut continuously up to the last. Now, you are ready for the next move.
Step 4: Continue the cutting of the next line
Once more, it needs to lift the deck and rotate the riding mower in another way.
While continuing a straight line, we cut the next queue, which is similar to the first stripe we did.
When striping will be like a professional one, at that time keep interchanging the shearing directions until the entire lawn is stroked.
Step 5: Final round of the whole yard
After completion of striping the yard, it is necessary to give one closing round around the boundary. If needed, at this time, eliminate any type of tiny loopholes or indiscretions. If we miss anything, it is high time to amend those problems. So keep on turning at the several points of the lawns.
Whatever showed here in how to stripe a lawn with a riding mower this is the easiest but efficient mowing approach. If you can follow step by step, your lawn’s look will change definitely.
Notable Factors We Need To Acknowledge
- When you stripe the grass, please note that cold season is best for striping the grass. In cold season grass becomes pliable and bending friendly as it holds the most moisture in the cold.
- Select your favorite pattern for striping. There are several types of pattern you may choose. With all the patterns, please take three part-Y turns.
- If you face obstacles like hard weeds, trees just follow the line as you are doing. If the plant is enough for pluck out, you can do it later on.
- It is necessary to take the highest caution when taking every turn. Those who are a novice, please take good care of this matter.
- For the starting issue, a beginner may start in a parallel way. Parallel striping can help keep the line straight.
- Grass size between 2.5 to 4 inches high would be the right time for cutting. Height More than will create a problem for bending and giving proper right size. We also suggest that the grass must not be cut smaller than this height.
- Be certain that the striping kit or the roller must be matched with the mower size.
- The technique of intensification of the stripe for bending the grass is to have the physical contact with roller and press the roller on the land.
- The reflection of light is very important for striking. This reflection is depending on your direction.
- The grass will appear light when the grass will be bent away from the stripper. The lawn will look dark when the bend’s direction is near to you. So we must be aware that the direction is going appropriately!
- In the case of Managing of striping kit, you can make your own, or you can buy.
- After finishing the entire task, you should take good care of your riding mower. Please keep it safe from rain and snow. Please place it in a dry place.
Conclusion
We are sure that you will feel enormously encouraged after reading all these matters of lawn striking. Now, you can make your lawn very enjoyable in employing your effort.
Here in our artifact how to stripe a lawn with a riding mower showed how you could add the perfections in every stripe. It is just an elementary understanding of the length, the vision– how grass may look in separate light, appropriate directions, seasonal impact on the turf, simple tools like striping kit.
Though for the beginner, it seems to be a little bit shaky, with a few days practice it become an amazing skill for them. Within a few days, you will see that your lawn will take a look as experts hands work.
- How To Melt Ice In Yard – 5 Effective Methods For You!
- How To Excavate A Hill : Know In 3 Minutes
- How To Level A Yard For Sod: With 11 Easy Steps
- Do you know how to make a lawn leveling rake at home?: Easy Way
- How to Edge Around Trees: 7 Easy Steps to Follow
- How to Keep Neighbors Dog from Jumping on My Fence: Best 5 Ways!
- How To Replace A Sprinkler Pump With 8 Easy Steps!