Do you want to remove the 721d PTO clutch of your grasshopper car? But do not understand how to remove PTO clutch on grasshopper 721d? Then read this article. We will show you the easy way to remove the PTO clutch through this article. You have a grasshopper 721d model. With which you prune the grass of your lawn.
When the green of the garden grows big, it shrinks through the grasshoppers this grasshopper powered by an engine. Long ago, there was no lawnmower. So it was complicated to mow the grass at that time. But in the modern era, this work has become much more accessible through grasshopper.
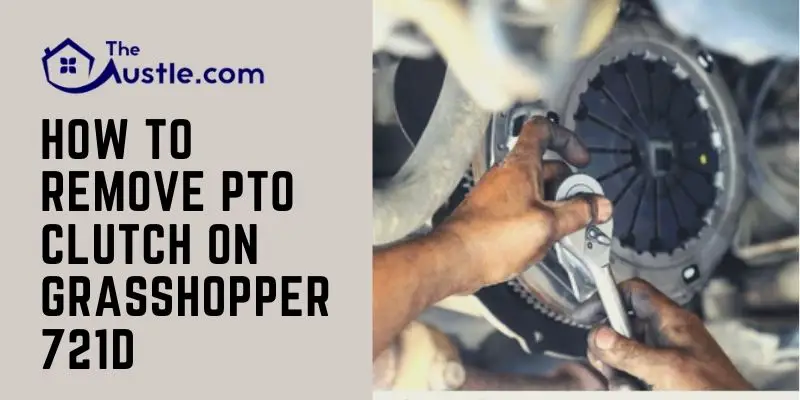
So when the grasshopper’s clutch has a problem, it needs to be removed. So if you want to know how to remove grasshopper 721d PTO clutch, then stay with us. We have mentioned a guideline through this article on how to remove PTO clutch on grasshopper 721d.
How To Remove PTO Clutch On Grasshopper 721d?
At first, we will discuss what a grasshopper is, its body parts work and how to remove a grasshopper clutch.
What Is A Grasshopper?
Grasshopper – The lawn grasses are pruned by a lawnmower. Usually, the grasses are the same size due to machine cutting. It cuts the trees according to your needs. Grasshopper has blades inside so you can change according to your needs. This machine update over time. Below are the details of the body parts of the machine and the update time.
- Model-721d
- Grasshopper 721d manufacturer John Derez
- Updated date 24.06.2020 7.20am
- Sale price -USD 7000
- Stock number- LM461
- Time-907
- Width cut-61in
- Horsepower -21 hp
- Fuel type- Diesel
How To Remove PTO Clutch On Grasshopper 721d in 6 Steps
Grasshopper’s grip is a little challenging to remove. But you can do it if you want. We need to have a good knowledge of all the machines we use. Then there is no need to go to the workshop with minor problems.
If we can solve the issues ourselves, on the one hand, time will save, and on the other hand, the cost will reduce. If you always have to go to the workshop for these small things, then the price will continue to increase. It is perfect if the work can be done by yourself.
Step: 1
At this stage, we will need some tools to open the clutch. They have to keep close at hand. It takes courage to do this. Many things are possible if you have the courage. Now you need to keep all the equipment like screws, welding machines, safety goggles, etc. Of course, you must have a good knowledge of the subject before doing any work.
Step: 2
Now keep your machine in a safe place. You decide whether to keep the grasshopper’s tool on the ground or top of something according to your convenience. However, it is better to keep the machine at a slightly higher place to work on it. Now your grasshopper’s clutch is ready to be removed.
If you do not dare to do it, you can take the help of someone you know who has done before. But it’s not a problem, dare and try it, you should can too. Now you can start working. You have to spend some time to do an excellent job of keeping one thing in mind. So take your time whenever you do your job.
Step: 3
Now there is a type of machine to remove the clutch, which has to set inside the clutch. To remove the grip, you have to go through three steps. You don’t have to work too hard to open the top first. You cover by iron on top. There is something inside the machine when a part needs to be stuck.
Through them, the clutch has to held tight and pressure created. Try to rotate the handle of the machine by pressing hard. After a while, you will see that the iron disc has come off the grasshopper. Now you have succeeded in the first step. Keep the drive well on one side.
Step: 4
After opening the disc first, I will go to the second step. The second step is to untie the bolts inside the clutch. For these, we can see that there are two holes on the outside of the grip. That hole kept inserting the pin. Then we’re going back to work. First, I will add two nuts into the hole from the nuts that the machine has.
The nuts should be twisted and fastened with holes. Then when the nut is attached, I will hold the device tightly with the grasshopper. Then I will turn the machine slowly. The big bolt inside which the clutch stuck will come loose. The pin has to held carefully so that the pin is not lost.
Step: 5
At this stage, we have to do the real work. Now we will take a welding machine. The fire of the welding machine will help to open the next disc of the device. We have to be careful when we do the welding work. Because at this stage you have to work with fire. As a result, if you are a little careless, a big accident can happen.
So we will try to wear a safety goggle when removing the clutch. Then we will hit the clutch by the flame of the fire so that the grip will gradually soften. The number of hits applied varies from machine to machine. Which device may need more runs, which machine may need less. After hitting the fire for a while, I will pull it gently with the machine.
Step: 6
At this stage, we were able to delete the clutch. When the clutches remove well, we did. Then it’s time to clean the clutch. We will clean the clutch with a brush so that the dirt inside it removes. After that, many people paint it to keep the clutch in good condition for a long time. On the one hand, the clutch stays suitable for a long time; on the other hand, the clasp looks like new.
Conclusion
Finally, we have known grasshoppers for a long time. It has updated over time. Today we have discussed the use of grasshopper 721d model in this article. For those with a grasshopper 721d model machine but cannot remove its clutch, every step of this article has explained in straightforward and fluent language. This grasshopper was last updated on June 24, 2020.
So many people may be thinking about this grasshopper because we are not familiar with many new machines. No worries because the clutch removal method is almost the same for nearly all devices. This article is thinking about grasshopper 721d. In this article, we explain how to remove PTO clutch on grasshopper 721d.