Have you any idea how to make a soil probe? If you eagerly want to make a soil probe for your garden or lawn, you have come to the right place. A green and healthy garden or lawn requires many kinds of stuff, such as fertilization, sound irrigation, pesticide, natural air, and sunlight.
Although those are important subjects, most healthy volumes depend on the healthy condition of the soil. And you have to ensure it by the proper mixture of other elements.
So here comes the topic of soil testing. It is a vital project before the starting of the garden, planting vegetables or grasses on your lawn. The soil test will determine the pH content and nutrition level of the soil. We are hoping that now you feel the requirement of a soil probe.
In the below, we will show you step by step to make a soil probe by your efforts.
How to Make a Soil Probe- Do It With Easy Eight Creative And Accessible Ways
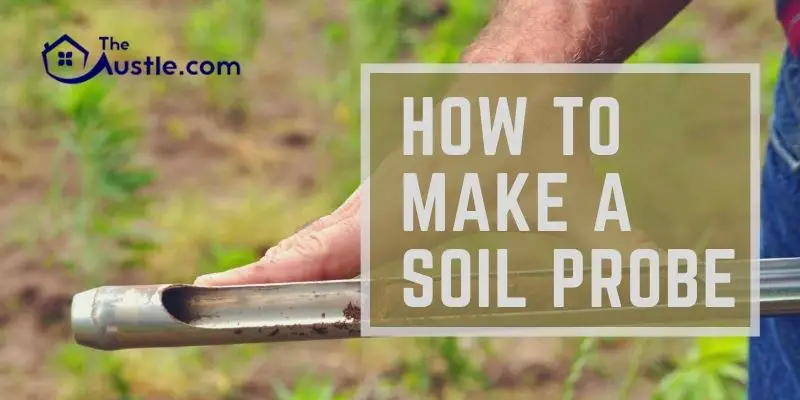
A soil probe is a soil sample collection equipment; it helps get a hurry response to information about the soil condition of the landscape. Moreover, it provides to determine whether your irrigation water reaches under the roots of the plants or even the water reaches deep beyond the plant’s roots.
Farmers, soil scientists, geologists, and soil consultants are mainly the user of the soil probe.
Soil sampling tools supply the accurate and genuine fact of the soil nutrition and soil type. In the market, you can find numerous types of soil probe of various brands such as T -handle, augers, extension, and more. But we will focus here on a soil probe in general use.
The soil probe contains a pretty straightforward process to make, just cut out a one-sided tube and push it down into the soil and pull out. You have to collect some tools to make it.
- Stainless copper pipe
- bolt and nut
- dowel made of hardwood
- T-fitting
Step: 1
First, take the copper pipe and cut it around 14 inches in length. This length allows you the opportunity to go deep inside the soil. On the contrary, if you don’t want this length, you can make it shorter.
Step: 2
In the second step, you need to mark the cut area, stain two perpendicular lines on the pipe—one up from the bottom and another down to the top.
Step: 3
Then draw a parallel line straight and up and down on the pipe to connect the two perpendicular lines. It would be best if you did not concern where you draw the edges because the tube is cylinder type. It is enough for you to see the core of the canal only.
Step: 4
Now time is coming to cut it, it will be much difficult for you to cut the pipe, but there are several ways you will find these that will help you make it.
It would be best if you chose something designed specially to cut a metal pipe, use a hacksaw, reciprocating angle or grinder, or even a tube cutting tool. Besides, while you are cutting the pipe, ensure your safety, wear safety glasses, and hand gloves.
Make sure the parallel lines are straight; this will remove about ½ of the copper pipe where the cutting process will finish. The radius corner size doesn’t matter, just confirm that radius corners are exiting on the pipe and easy going to the cutting tool.
Step: 5
In the fifth step, you have come to attach the T-fitting and connect it to the top of the pipe. It would help if you soldered the copper pipe to joint it on the exact holding place, after that, make a big hole by drilling to accommodate the bolt.
Where the pipe and the T- fitting overlap jointly make an effort to give the center of the hole. Both the soil probe sides should get the hole’s facility and confirm the hole should be amplified through both sides.
Step: 6
While you become successful in making the hole, you have to connect the bolt and nut. So tighten the nut and bolt should be inserted.
Step: 7
To use the handle, 1″ portion of the T-fitting should be inserted down. That’s it, hope it will go for a pretty easy to utilize. If you have the sections are lying around and the equipment and know-how to make a soil probe.
Step: 8
Now your hand-made soil probe is ready to use. Go to your garden or lawn to check the quality and the working facility of the soil probe, hope you got something decent and a great device.
How Can you Make a Good Sample by Soil Probe
when you will take an example with the help of a soil probe, you should focus on some issue –
- Allot the land into different parts according to experience and observation.
- Carry away the surface a little from the fixed spot.
- Drive the soil probe into the soil around 15 cm and collect the sample by drawing the sampler.
- Take a test 15-16 sample from the single unit and place them in a bucket
- Mix all of them and take some in a packet or bottle.
- Do the same work with the same spot.
Conclusion
Providing good soil sampler from the market, always showing to spend a good amount of money for you, and good-quality maintained tools usually could not be easily found with a long life. So it will be a wise decision for you if you make a soil probe. This article tells you the steps on how to make a soil probe by your enforcement.
- How to Fix Burnt Grass from Over Fertilizing: Replant procedure with 7 Easy Steps
- How to Start Echo Weed Eater- 7 Best Steps to Follow| Feature, Problem, and Tips
- How to Pack Pea Gravel: 6 Easy Steps of Installation Process with Tips
- How To Install A Fuel Shut Off Valve: Easy Way
- How To Charge Dump Trailer Battery- Simple Solution For You
- How To Sharpen Lawn Mower Blades With A Bench Grinder
- How to Make Your Grass Dark Green, Do It with Your Passion in 7 Best Steps