If you want to make or repair your house, you will need bullnose brick and must know how to lay bullnose brick.
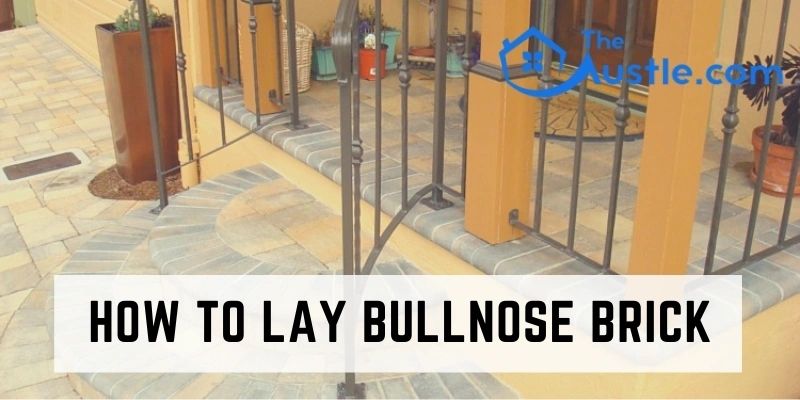
Because bullnose brick used in the bottom edges of the floor, the top corner of the walls, curved edges of the wall or floor, building corners, balconies, or in the staircase steps and to look the house attractive. You should also know brick bullnose is not used for arches.
But it gives us a headache when we are going to do something but doesn’t know how to apply it, so it is a good idea to learn beforehand. If you don’t know how to lay the brick, here is a solution for you to consider the following.
Types Of Bullnose Brick
In bullnose brick, one or more corners of its are round off. There are many common types of bullnose brick. The single type of brick is a kind of masonry in which only one corner of the brick is round off. Double bullnose brick has two corners rounded off.
And when both of the edges of the brick is the same, that is called cownose brick. One of the top header corner sides of the brick is round off in single bullnose header brick. Double bullnose header brick is most likely to single bullnose header brick. Both of its top header corner sides are round off.
Single bullnose stretcher brick is a type in which the top stretcher side corner of the brick is round off. In Double bullnose stretcher brick, both of the top stretchers, side corner is rounded off. Bullnose brick gives a dashing look with a smooth finishing touch. So when you plan to use tile must include brick bullnose.
How To Lay Bullnose Brick In Your House
Ingredients You Will Need
- Safety goggles
- Hand gloves
- Mallet
- Brick Bolster
- Hand Brush
- Caulking Gun and Grout Float
- Adhesive
- Brick Saw
Step 1: Measure The Area
Before laying a bullnose brick, first of all, you need to measure the installation area. You can find bullnose brick in the masonry market. They sell this type of brick individually. But you need to measure the length of the tile according to the installation area, but make sure you note it one foot extra for each tile. This required for your safety of cutting tile.
We need to measure beforehand because if we don’t cut the block accordingly, we will have to redo it, and it will cost our time and will also be wasting the brick. Using a scale, measure the area.
Step 2: Cut The Tile
For your safety, wear safety goggles and hand gloves first. After measuring the area, cut the tile with a brick saw or diamond blade to the measuring shaped. Mark the size in the tile using a pencil.
First of all, straight up the edge of the brick to cut appropriately. Using a brick saw, cut the tiles, then bring them all to the laying place of the wall and check if they fit well with the edges or corners or on the floor.
In this step, you can also use the mallet and brick bolster to ensure a flat and clean surface for laying the tile. Use the hand brush to clean the area so that the adhesive mix well with the surface.
Step 3: Lay Bullnose Brick
Now it’s the most important and easy part of this task. If you don’t know how to lay bullnose brick after you have arranged everything, it will waste your effort and cost you a great one with your time and money.
Put a small amount of glue and adhesive around the laying area. You can also use mortar instead of glue. There are so many kinds of brick glue you will find in the market. But the Gorilla glue and Rhino glue is rated strong enough to work with brick.
Using caulking guns and adhesive in the area, ensure all corners and step-downs secured with equivalent adhesive. Be careful that the glue doesn’t get too close to the front of the blocks. Then place the brick bullnose pressing them tightly. See if they go well with the area and according to the design.
Step 4: Give A Finishing Touch
It’s not over only after laying the bricks. Some important points you have to know about how to lay bullnose brick. Check if the tiles are placed right and leveled. After laying the bricks, use a grout float to apply grouts to the joints of each brick bullnose.
It will also help to remove excess glue from the area and then clean them. You have to let them dry for approximately 24 hours. After drying off, ensure that the brick bullnose is installed suitably with the right measurement. Your query about how to lay bullnose brick will end after this finishing touch. So go for it.
Tips to Follow:
- Measure the tile one foot extra for each one
- Before applying the adhesive make sure to clean the surface with a hand brush
- Don’t let the glue spilled on the wall
- After laying the bricks dry them for one day to two
Verdict
If you are inexperienced or new in this work, it’s a normal thing that you won’t know how to lay bullnose brick. But it’s not that hard to work. It’s very similar to regular tile installation. The difference is that bullnose brick is a little bit rounded used in a small or curved area.
Therefore we found the easiest way of laying bullnose brick. And it’s the best idea to use bullnose brick tile design, and it helps to hide rough edges. It protects the corners, works well as the baseboard trim, and for the finishing touch of any building. So it is the best option to use brick bullnose in any project.
- HOW TO TURBO A LAWN MOWER – You Must Know the Best 7 Steps
- How To Connect Sprinkler System To Faucet Of Your House – Some Easy Method in 3 Ways
- How To Start Up An Asphalt Seal coating Business in 2 Best Methods
- How to Cut Sod by Hand – Very Simple and Easiest 8 ways
- How To Get Rid Of Annual Ryegrass – 4 Better Steps
- Don’t Know How To Sharpen PVC Cutter? Here’s The Solution in 5 Easy Steps
- How To Make A Leaf Plow – The Best Fantastic 7 Steps