Do you want to know how to install flush mount truck toolbox? A flush mount truck toolbox is a storage box. It is specifically designed to fit in a truck. Flush mount truck tool boxes are also known as the sliding truck toolbox.
Common materials for truck tool boxes are aluminum, steel, and plastic. Full-size pickups are universal for truck toolboxes. Toolboxes often come in semi-custom sizes. This enables the box to fit a variety of trucks. These truck tool boxes are great.
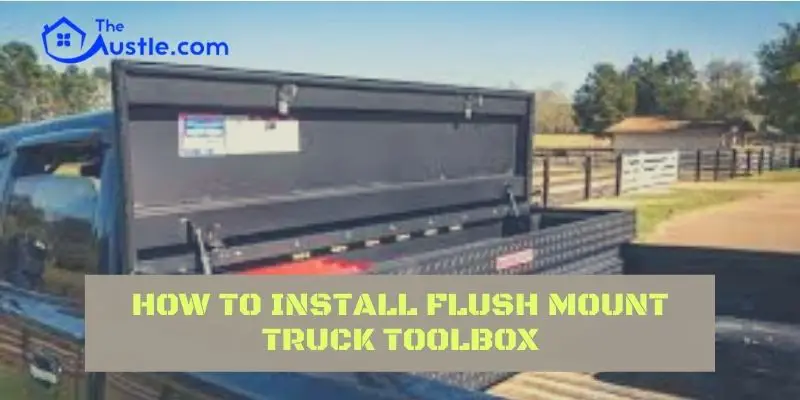
It is also providing security and protection to your tools. It also gives an excellent look to your vehicle. It is covering very little space in your truck. Keep your tools and other essential safe and within easy reach with the Flush Mount Truck toolbox from northern tool.
The northern tool side bed flush mount truck toolbox is an easy to install aluminum box. The flush mount truck toolbox sits below the truck bed rails. It is leaving plenty of room for additional storage space in your truck bed. Want to know how to install flush mount truck toolbox? Here you have that answer –
Learn How To Install Flush Mount Truck Toolbox
Select The Right Toolbox
First of all, take careful measurements of your truck bed and consider the truck make and model of your truck. Then, choose a toolbox designed to fit the design of your vehicle. When you receive the toolbox, then place it in the back to ensure it fits properly before continuing with the installation.
When you shop, consider the overall look of your truck. The point color, bed lining, and trim will all play a factor in which finish makes the best choice for your vehicle. Make a note of the interior cargo room, and any dividers to the organization feature the box contains.
After the toolbox lowered into place, open the lid, and make sure that nothing is blocking the hinges of the truck toolbox.
Features of flush mount truck toolbox
- 5 × 13 × 11 inches in size.
- Ample storage.
- Sturdy metal-reinforced, It’s lid has adjustable strikers, premium shock arms.
- Provide more security.
Add Rubber/Foam Padding
Metal made flush mount truck toolbox can scratch a metal truck bed. When you drive over uneven ground, it can be incredibly noisy. Protect both the truck bed and the flush mount truck toolbox with a rubber/foam padding layer to make the transit nice and quiet.
This material is available by the roll. It is easy to cut with a durable pair of scissors or a razor blade. Carefully measure the toolbox and cut into the shape of the rubber/foam padding wherever the truck toolbox will be in contact with the truck.
It’s not necessary if the truck bed has already fitted with a full liner.
How To Install A Flush Mount Truck tToolbox
There are two ways to install a flush mount truck toolbox.
- Without drilling.
- With drilling.
Without drilling
How to install flush mount truck toolbox without drilling– many trucks come outfitted with pre-drilled holes to make installing a truck toolbox and easy.
Would you like to know how to install flush mount truck toolbox with pre-drilled holes? It’s quite easy-
- First of all, remove the rubber plugs from the pre-existing holes. With those plugs removed, the bottom of the flush mount truck toolbox you choose should nestle down to align with the pre-existing.
- Secondly, when everything is aligned, use J-hooks/standard nuts and bolts to screw the box securely into place. Most of the flush mount truck tool boxes use between four and six bolts, depending upon the size and design of the box.
- At last, tighten the bolts until they are snug, but don’t over-tighten, as this could cause rail damage.
With drilling
How to install flush mount truck toolbox With drilling– some flush mount truck tool models don’t come with pre-drilled holes.
There are some steps to follow-
- Firstly, drilling the holes yourself. Measure the placement of the box carefully. Then, drill four to six holes in the truck bed using a powerful drill.
- Secondly, Lower the flush mount truck toolbox into place and line it up with the drilled holes.
- At last, Use J-hooks/standard nut and bolt set to secure the flush mount truck toolbox into place.
Why Do You Choose A Flush Mount Truck Toolbox?
Are you ever wanted to have a box in which you can store all your tools, including your wrenches, jumper cables, and sporting goods, etc? Then the flush mount truck toolbox is the right choice for you. Safety is also increased because the flush mount truck tool boxes won’t obstruct your views.
Be Sure Everything Works Properly
You have tested the lid to make sure toolbox opens and closes freely, all that’s left to do is load it up with your essential tools.
Make sure to clean out the flush mount truck toolbox regularly, so dirt, debris, and moisture don’t accumulate inside. When cleaning out your truck toolbox, give it a quick inspection to ensure the bolts haven’t loosened over time. If they have, tighten them and reload your essential tools. This is how to install flush mount truck toolbox.
Flush Mount Truck Tool Boxes Were Out Of Necessity
The flush mount truck toolbox for the truck was designed to solve a need, but our chief design engineer saw it wasn’t being met the requirement. So, he committed his talents, resources, and passion for building truck tool boxes from ZDOG worldwide headquarters in parker, colorado, USA.
Now, you know how to install flush mount truck toolbox properly. With storage this easy to install, you’ll be tempted to purchase a flush mount truck toolbox for any truck-owner on your shopping list. Take on the task yourself instead of a professional for installation.
- 5 DIY Tricks To How To Keep Grass From Sticking To Mower Deck!
- How To Get Lawns To Mow-15 Best Tips For You
- Inclusive Guidelines On How To Take Off Weed Eater Head in 3 Easy Processes
- Easy Way to Know: How to Tell If Mower Deck Spindle Is Bad
- How To Get Lost Title For A Trailer in 2 Best Ways
- How To Start A Red Max Leaf Blower: Best Guide With Simple 11 Steps
- Wanna know about How to divert a natural spring? Solution for you